Monday, February 18, 2013

DIY February: T-Shirt Re-Fashion

Last week I skipped blogging my latest sewing adventure. I was on Pinterest one day and found a bunch of tutorials from people who take old, too big or ugly clothes and turn them into something beautiful. I raided my clothes and found this simple white long sleeve shirt that I rarely wore, and decided it had another destiny. I intended on posting a tutorial but I had no idea I was doing... so I forgot to take most of the photos. Here is the shirt before:
 
 
The shirt fit pretty well, the sleeves were a touch short and there was a blue stain on the sleeve.

 
Here is the finished product, not a great picture but you get the idea. Now it is a darling white short sleeve shirt with a hint of girly-ness perfect for spring!
 
 
Up next in my refashion adventures see this maternity dress turn into a maxi skirt.

 
see this too big clearance find turn into a maxi skirt too... and probably something else...

 
On another WAY cuter note! hope you enjoyed Valentines Day and get ready for an adorable Valentine themed tutorial later this week!


Friday, February 8, 2013

DIY February: Reusable Snack Bag

 
I am loving this DIY February thing, and can not wait to share an adorable Valentine with you!
This week's project is a reusable snack baggie, which brings out my inner earth momma-tree hugger. I saw one of these (mind you it had a zipper) at Target for almost 10 bucks! this will cost you under that and you can make 4!
 
Supplies: scissors
Soft velcro
ruler
pins
sewing machine
Fabric- I used the same thing the outside of cloth diapers are made of, found in the baby aisle of Joann Fabric. 1/3 yard
 
 
Cut yourself a piece of fabric 14 inches long by 7 inches wide.
 
 
Fold over your edge an inch (you'll see why in a bit)


If you want you can iron err..."straighten" your edge.
 CAUTION!!! DO NOT, I repeat do not iron the slick side of this fabric, it will stick to your "iron" and since the inner layer melts you don't have to use any bonding to stick it together.


Cut yourself a piece of velcro about 6 1/2inches long and center it on your folded edge. I used steam-a-seam to keep the velcro down while sewing.

 
Sew a straight line in the top and bottom edge of your velcro to make it look especially pretty.
Repeat with the other side and piece of velcro.


Pin your right sides together and try to line up the velcro.

 
Sew both sides being sure to backstich at the beginning and top edges to keep it together. To achieve a 6inch finished project sew over your velcro on either side. This will also help the mouth of the bag stay open.

 
Now turn it right side out and enjoy your finished snack bag, perfect for grapes, and easy for tiny hands to open.


Monday, February 4, 2013

Minnesota Lovin'

In January JJ and  I had the opportunity to travel to Minnesota to visit my family. We traveled by plane, since we're pros at flying now. From the second we arrived, JJ got all of the squishing, kissing, hugging and loving he could handle... and more I'm sure. 


Grandma loved, LOVED having JJ around (and me too I guess)

 
JJ even gave grandma a big, slobbery kiss on the cheek.
 
 
JJ enjoyed playing in the Tupperware drawer while we cooked in the kitchen.

 
JJ practiced walking with grandpa

 
more fun in the Tupperware drawer.

 
"Ba Ba Ba, Ba Na Nana.... Po TA TOOOO! oh man I have that song stuck in my head"

 
While we were in Minnesota JJ switched to drinking formula after we both got the stomach flu and he wasn't getting enough to eat from me. Since he switched to the bottle he has been a lot happier. Grandpa got a chance to cuddle the little guy while he had a bottle.


Uncle Brian sure loved this little guy.


Awwww, aren't these too cute?

 
The boys decided that their goal was to get JJ to walk while we were there... it didn't happen but they sure tried.

 
Uncle Braeden and JJ


Everyone loved playing with JJ especially Joycelyn! The last time we visited Minnesota Joycelyn tried to get JJ to smile and it didn't quite work, so this time she tried again and finally got a smile. Visit Joycelyn's blog and see more fun pictures from our time together. p.s. Isn't she adorable? (the correct answer would be YES!)
 
 
Uncle Spencer took some time to teach JJ how to properly rock out on the drums!


Auntie Shannon even stopped by for dinner and a quick jam session.
 
 
JJ also discovered the piano in the front room. We had to get some pictures, especially since he looked so handsome in his vest, tie, and hat!

 
Our little piano man serenaded us with some Train and James Taylor.

 
Last time we were in Minnesota we made some pretty good homemade potstickers, this time we stepped up our game and made them AMAZING! My family has this completely healthy obsession with Chinese food and sushi and if we make it ourselves we can eat it more often!!!
 
 
We also decided to get a quick family picture, we almost always have outtakes which are sometimes better than the final picture. It is always great to be home, and see my brothers growing up. We are becoming better friends the older we get, Which is great because we haven't always gotten along so well. It was a wonderfully jam packed trip and I also got to spend some time with my girl Amanda at Caribou Coffee just like old times. I am so grateful for the opportunity I had to spend time with my family and can't wait to do it again in March!!!

Friday, February 1, 2013

DIY February: Valentine Countdown

It is officially February! Welcome everyone from A Little Knick Knack's EBTKS link party, and if you haven't checked it out yet, head on over HERE to see all of this week's projects. As part of my "Happiness Project" this month I am making at least one craft a week, along with posting a tutorial on the blog. I am starting my month of crafting off right with a darling and ridiculously easy Valentine countdown, plus you can't go wrong with chocolate!
 
 
You will need:
A leftover cardboard box
Red paper
White paper
14 Dove chocolates (plus a bunch more for eating!)
Stamps or Stickers
Black pen
Glue stick
Scissors
 
 
Start off with some cardboard from a leftover box, and cut it just smaller than a sheet of paper.

 
Tape the paper on your cardboard piece, it doesn't have to be perfect that's part of the DIY charm.

 
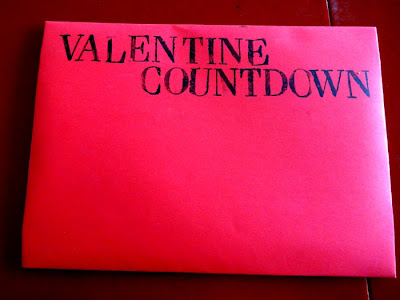
Use stamps, or stickers to title your countdown.


Next use a heart punch or another small punch to make 14 small hearts.

 
Use a glue stick to attach your hearts to your Dove chocolates, try not to eat too many of the chocolates while you work!
 
 
Attach the chocolates to your board, I wrote a secret message for my sweetheart to discover and ended it with an exclamation point.

 
Then number your chocolates so your sweetheart knows when to eat them.

 
Add a few extra hearts for cuteness.
 
 
And your all finished! Surprise your sweetheart with this and buy yourself a few days to get that present for Valentines. Go ahead, Get crafty!