Thursday, April 19, 2012

A Baby Story

Here it is! My first post-baby blog post. March has been quite the whirlwind month for our family, with a new baby, and family coming in and out to meet our little one. At the beginning of the month it felt like I was never going to have the baby, but all of that changed in an instant.

 Here is our little one's birth story, I'll be sure to spare you all the tiny details. Just a heads up this might be a lengthy post.

March 13th, just before 7am: I woke up with a killer charlie horse in my calf and I was pretty sure my water had broken but of course I wasn't sure. Thinking back on it it probably broke much earlier in the night, but then again I dreamt of having the baby too. Justin was just leaving for work and I hesitated telling him. Since I wasn't 100% sure I sent him to work (looking back probably not the best idea) Next I ate a bowl of cereal, showered, packed my bag and the diaper bag, did the dishes, and did a load of whites before calling my mom to figure out if my water had broken.

Around 9am (all the times are estimates): I packed the car, installed the car seat base, and even recorded a short video on our new video camera. Then I drove the 5 minutes to the hospital and checked myself in. They ran a few tests, hooked me up to the monitors and confirmed my water did break and I wasn't leaving the hospital without a baby. (I wasn't having any contractions at the time)

11:30ish Justin grabbed a few things from our house and came to wait it out in the hospital. Sometime around then the placed an IV in my arm and started me on a Pitocin drip (makes contractions stronger or starts them)

1pm: I was having contractions and was only dilated to 1cm, the same as the 2 weeks before at my doctors appointments.

Sometime in between: My contractions were getting stronger and were consistently 2-3 mins apart. The doctors were having me flip from side to side and they even brought in an exercise ball to get me moving  and keep the baby's heart rate down.

6pm-ish: I started shivering and felt super cold, apparently I had a fever from my water having broken so long ago. I broke down and got an epidural, I would have liked to be able to do without it but I was still only 1cm and the nurses said I probably wasn't going to have him until probably 2am... The epidural didn't hurt but it felt weird like a bubble popped in my spine... right after the initial dose it worked really well and evenly. The only problem I had with it was that it made me even more cold than I felt before (apparently one of the side effects) Justin's Dad and Kathy came for a visit and ate dinner with him in the cafeteria.

(all of my IV bags attached to me... Fluids, fluids with sugar, fluids for the baby, antibiotic #1, antibiotic #2, epidural meds and last but not least pitocin my oh so favorite at this point. I was also on oxygen for quite some time since the baby was having late decels in his heart rate and this helped it to stabilize.)

8pm roughly: They checked and I was dilated to a 4, which was probably the best news I heard at that point. The night dragged on for me, I tried to rest but it was hard with the noise from the oxygen mask. My epidural also started to wear off on my left side while leaving my right side virtually numb.

maybe around 1:30ish: I was talking to the nurse about my epidural problems and she suggested that she check me because if I was dilated far enough I would be able to start pushing, and that might alleviate my pain a bit. She checked and I was! so she started getting a table with stuff together and setting up my room for delivery. Justin set up a chair for himself near the head of my bed when the nurse asked him what he was doing. He was planning on holding my hand helping coach me along. The nurse however had other plans for him... he was going to hold my leg and coach me from there.

After maybe an hour of pushing our lovely little boy was born at 2:36am without any complications for either of us, other than having us both having a fever. Justin even cut the cord! He was much bigger then I had anticipated, at 8 pounds 7 ounces, the doctor even asked where I had been hiding all of him. When he was born he had quite the cone head which is hidden by the hat in the next picture.


4:30am we moved to the recovery room, I was a total zombie! luckily they took the baby for a few tests and to get cleaned up so that we could get some sleep.
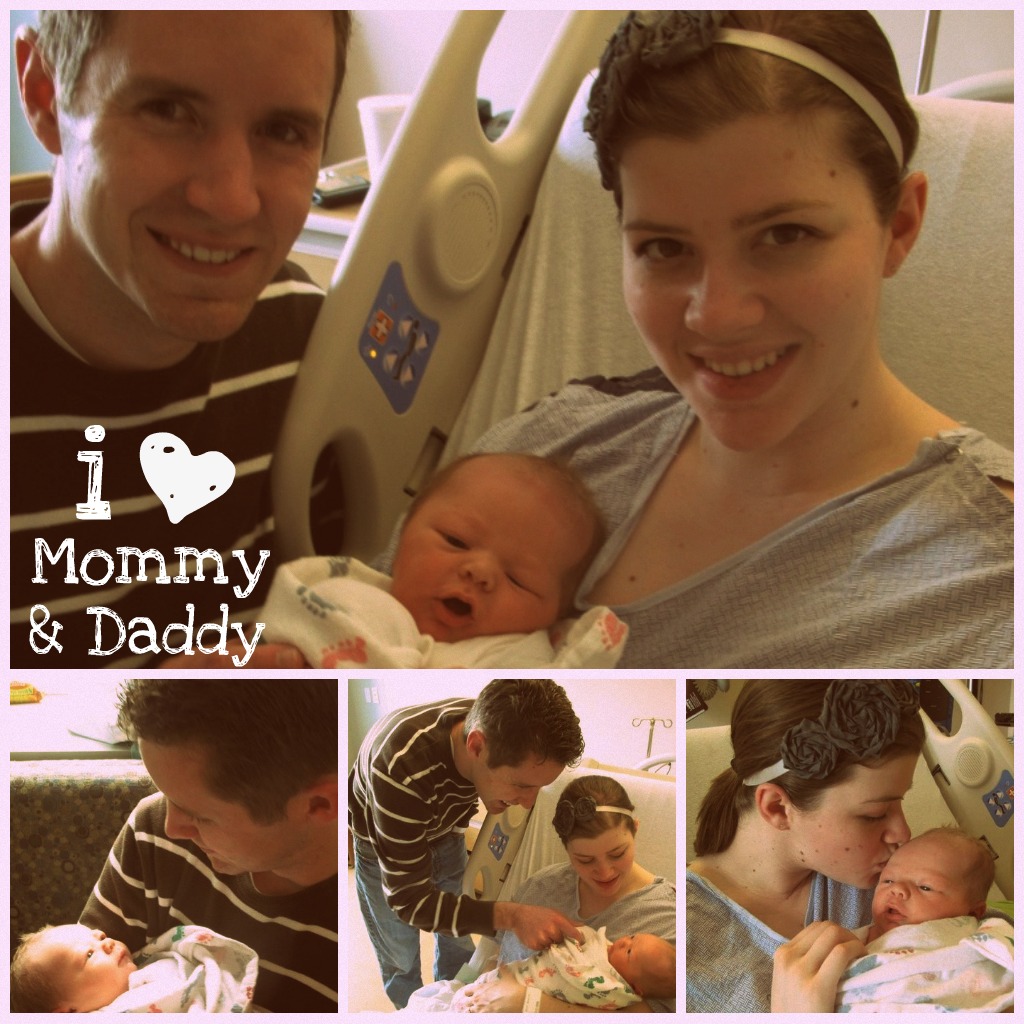

 We named him James Jack Hugie, James was simply a name we could agree on and a strong one in the scriptures. Jack is for Justin's grandpa Hart a wonderful kind and caring man. The next day (Wednesday) sometime Justin's Dad and Kathy came to visit and meet JJ. Later on the nurse took JJ's temperature and it was low, so they took him for a few tests and discovered that his blood sugar was low. He was having trouble nursing as well which wasn't fun for either of us. Thursday night Justin went home to sleep since he had to return to work the next day. JJ and I were discharged on Friday morning.


Thankfully my mom came out Friday afternoon to help me with the baby. The next weekend my family (mom, dad, and brothers) came out for a week. Next Justin's family (mom, ed, jolie, becky and makua) came and overlapped with mine for a few days. We were able to have JJ's baby blessing on the Saturday of general conference while most of our family was here. Over Easter weekend more family came (grandma and papa Looney, and the Irving clan) We are so grateful to everyone that came out to meet him, but we're also glad to slow down and enjoy time with each other.

 I will be sure to post more pictures of our family adventures and our growing little man, so stay tuned! 

Tuesday, March 6, 2012

The Baby's Room

The last week or so has been quite a whirlwind for me.  Saturday was my last day at work until about 3 months after I have the baby, it's weird to say good-bye to yet another job but at least I'll be going back to this one. Monday I broke one of my molars (It didn't hurt at all) and had to get it fixed, since we don't have dental insurance I was pretty stressed out. I went to my Mom's cousin Fred Luedtke who has his own dental practice in Bountiful and he set me up with a temporary filling until after I have the baby. If you need an awesome dentist in Utah let me know and I'll pass along his number!

In all of the hustle and bustle we've finished putting together the baby's room (so exciting!!!) Here is what it looks like, now all it's missing is a darling little boy (if only he wasn't so comfortable inside my belly)


We got the wall decals as a gift at our shower, they add life to the plain white walls. His closet is full to the brim with toys, blankets, and clothes. We've got the carseat and stoller all set up all we have to do is install it in the car. Look at the adorable bedding! my mom made it and it looks awesome!


I bought this changing table dresser on KSL for 40$ then I painted it a more fitting shade. It took four coats to get a smooth finish. Originally I was going to make drawer pulls out of golf balls (but that didn't happen) I also added some storage buckets to keep the essentials within reach.


I found these hanging baskets at IKEA, they're intended to be used with different rails but those ones were too long. I found drawer pulls that were small enough to fit on the side of the changing table. I have the supplies to hang another set underneath the first but havent decided whether or not to do it.

I just can't wait till this little guy comes! I am getting incredibly impatient and I hope that at my doctors appointment tomorrow I get some good news. Hopefully the next thing I blog about will be this little guy, although I should probably complete my march craft before he gets here.

Wednesday, February 29, 2012

February Craft: Rosette Headband


Since February was coming to a close very quickly, I needed to keep my resolution for one crafty thing a month. I wanted something simple that didn't involve a lot of expensive supplies or lots of cleanup. I'm hoping that I won't procrastinate this much in March, but then again who knows. I bought the stretchy headband in a pack at Michael's, and had the grey suiting material from some other projects. The rosettes are extremely easy (sorry I didn't shoot a tutorial this time)

First you cut a circle the size you want your finished flower. Next cut a strip of fabric somewhere between 1/2 inch- 1 inch wide (it doesn't need to be perfectly straight) and quite long... I didn't measure I just cut off the excess at the end. Tie a knot at one end and hot glue to the center of the circle. Now twist the fabric around the center knot and secure with hot glue. Tuck the end under the original circle, then glue them directly onto the headband or clips if you prefer. I'd suggest doing a practice flower if you're nervous, but keep in mind they aren't supposed to look perfect!

UP NEXT: Baby's room

Wednesday, February 22, 2012

Slow Cooker Challenge: Week 4


This week was a turning point for me and the slow cooker, I actually looked forward to using it this week! I found this awesome recipe on Pinterest which linked to this Blog with quite a few recipes and mouth-watering pictures. When I told Justin I was making ribs his eyes lit up, he might have even started drooling a bit. I can't recall having ordered ribs before, I would definitely be intimidated to cook them without an easy recipe like this.

The recipe was adapted from: America's Test Kitchen Slow Cooker revolution

1.5 tbsp sweet paprika (I used smoked)
1 tbsp light brown sugar, lightly packed
1/8 tsp cayenne pepper
S&P to taste (about 1 tsp each is what I used)
2 lbs pork baby back ribs (I had 2.4lbs) - leave the membrane on the ribs to help hold them together
1 cup barbecue sauce (I used Sweet Baby Rays)
Vegetable oil spray.


Mix together brown sugar, cayenne, paprika, salt, pepper, rub both sides of the ribs.


Spray the inside of the slow cooker with vegetable oil. Place the meaty side against the crock pot with the thicker end on the bottom. Top the ribs with BBQ sauce and cook on low for 6-8 hours ( I did 7 1/2 and I think they would have been fine at 6 1/2-7) I added a few tablespoons of beef broth to keep everything moist.


Remove the ribs from the Slow Cooker and pour the sauce through a strainer into a small saucepan. Reduce about 10 mins ( I added a bit more broth and bbq sauce)


  Brush sauce on bone side and broil for 3 mins, then flip and repeat on meaty side. Be sure the rack is about 10 inches away from broiler so the sauce doesn't burn.


Cut ribs apart and serve extra sauce on the side, with your favorite side dish. When I asked Justin what we should have with the ribs he immediately suggested homemade french fries.


Justin definitely enjoyed this dinner! He Mmmmmmmm-ed all the way through the meal, and said they were better than Famous Daves (what an awesome compliment!) He also said that he didn't think that we would be eating this good this early in our marriage. The ribs fell right off the bone and tasted wonderful!!! I was very impressed with myself. Our meal costs less than 15 dollars for both of us, which is less than you would spend at a restaurant for the same meal. So go on, make ribs at home and impress everyone!

COMING UP: baby's room, and countdown!

Friday, February 17, 2012

Slow Cooker Challenge: Week 3


So here it is week 3 of my challenge and I haven't gained the love for slow cooking that I thought I would. It is still hard for me to pick a recipe and to plan starting the cooker into my day. I chose this weeks recipe because it was made with simple ingredients, most of which I already have on hand. I found the recipe in a taste of home cookbook, accompanied by a full page picture of what it should look like. Here is the recipe tweaked to my liking:

Chicken Saltimboca
4 Chicken breasts
4 slices deli ham (I used 8 since mine were really thin)
4 slices Swiss cheese
1/4 C flour
1/4 C Parmesan cheese (grated)
1/2 tsp each of Salt & Pepper
Vegetable oil
1 can of Cream of Chicken soup (condensed, undiluted)
1/2 C Chicken broth

Hot Cooked Rice

Combine flour, Parmesan cheese, salt, pepper and set aside. First Butterfly chicken breasts and pound out to 1/4in thick. Lay a slice of ham and cheese on each piece and roll tightly securing with toothpicks. Roll each breast in flour mixture (the original recipe said chill for 1 hour, I didn't have that kind of time... I skipped right to the next step) Brown chicken in oil on all sides and transfer to crock pot. Mix soup and stock and pour over chicken. Cook 2 hours on High (Original recipe said 4-5 hours on low, but I was on a time crunch) until meat reaches an internal temperture of 170 degrees.


So here is the finished product, it wasn't as perfect as the picture in the cookbook. Justin tells me that it doesn't always have to be perfect... I think it should be.


 We shared our slow cooker meal with two of Justin's friends from California, Mark & Brian. All of the Boys really enjoyed the meal and had only good things to say. I liked it quite a bit more then I thought I would. I was weary of the cream of chicken soup as a sauce since I can't recall ever having it before. I think this recipe would be a great back-up freezer meal if you took the time to prep the chicken and combine the soup and stock. Another successful meal made, now we're looking forward to our slow cooker ribs.

Wednesday, February 15, 2012

Slow Cooker Challenge: Week 2


Here is my week 2 recipie, although it's now week 3 of my challenge. I am finding that it is a challenge to find recipies that I want to make in the slow cooker, I also have a hard time planning ahead to start it in the morning before I leave for work. This week when I asked Justin what I should make for my slow cooker challenge  he said Macaroni and cheese with a big smile, but after some hinting he approved the making of French Dip Sandwiches. I found a base recipie in a taste of home cookbook and modified it to suit our tastes and scaled it down so we didn't have lots of leftovers.

French Dip Sandwiches

I Boneless Chuck Roast (2-3 pounds) cut into large chunks (I did 5 large pieces)
1/4 C water
2 1/2 C Beef Broth
2 tsp Dried Basil
2 tsp Dried Oregano
2 tsp Garlic Powder
1 tsp salt
1 tsp pepper
1/2 Med Onion (sliced)
Hoagie rolls
Swiss Cheese


Put the meat in slow cooker putting onion slices underneath and inbetween the meat chunks. Top with herbs, seasonings, water, and broth. DON'T brown the meat befire putting it in the slow cooker, I've learned that the meat is more tender and falls apart better if it goes in raw. Cook on low for 7-8 Hours.


Pull the meat apart discarding the fat. Strain the juices. toast tolls so they're crusty and don't fall apart when you dip your sandwich.


I dipped the meat back in the juice before putting it atop the roll so it was extra juicy. I also topped the meat with swiss cheese and broiled it until melty.


Serve your sandwich with the meat juices for dipping and something on the side, we served leftover mashed potatoes alongside. These were really good! Justin liked it so much he wanted another half a sandwich after his first was gone (He LOVED that he had the juice for dipping) I loved the taste and the fast that it involved very little work.

UP NEXT: slow cooker stuffed chicken and RIBS!!!

Friday, February 3, 2012

Slow Cooker Challenge: Week 1


I knew trying to find a recipe I waned to try for the slow cooker would be difficult but I didn't think it would be this hard. I am kind of a picky eater, at least compared to most average Americans. My mom was not fond of certain foods and I therefore I am pretty biased too. I almost never use red meat (poor Justin) or fish, and try to use fresh ingredients as often as possible. I was browsing Pinterest one night and found a recipe for slow cooker macaroni and cheese. This is the recipe I used and here is my version.

1 1/2 Cup Milk
1 12oz Can Evaporated milk
1/4 Cup Butter (half a stick melted and brought to room temp)
3 Large eggs
1/2 tsp. salt
3 Cups shredded Fontina cheese (I used Cheddar)
1/2 Lb. Elbow macaroni (boiled for 5 mins only)
1/2 Cup Parmesan cheese
pepper and other spices


I started by shredding the cheese, I bypassed the grater and went right for the food processor (my favorite kitchen gadget)

Spray the slow cooker or grease with olive oil then mix butter, eggs, milk, salt and evaporated milk and whisk till smooth.

Add the cheese (not Parmesan) and the noodles and mix to combine.


Top with Parmesan cheese and pepper (and other spices if you want) Cook on high for 30 mins. Switch to low and cook another 2-2 1/2 hours. The original recipe says that it should only sit on warm for 30 mins, I have no idea why but I'd follow it anyway.

When it was finished mine had quite a bit of oil or grease sitting on the top so I grabbed a paper towel and mopped all of the excess up. After that I browned about 1/2 cup of panko bread crumbs with a touch of olive oil and spread over the top of the macaroni.


My macaroni didn't quite look like the picture I had with the recipe. It made 4 really good sized portions, good for having people over! Justin said he'd give it an 8-9 out of 10, and then said he might want to change it to a 10 out of 10. Needless to say Justin put his stamp of approval on the recipe. I would give it a 7-8, I felt like it should have been more creamy. My favorite part was the really cheesy parts. Although I liked it I would probably still go with Kraft (even though it's terrible for you) because the prep and cook time is a lot more convenient.  All in all I would have to say another slow cooker success!